
Download this guide, open it as markdown or explore our other manuals using the buttons above.
Use (Ctrl or CMD) + K to activate fuzzy search.
Note: Getting started? We recommend reading your rendering software's Drop & Render manual for your specific application first. This document covers supplementary information on the wider Drop & Render platform.
The Drop & Render toolbox
We have multiple tools available for different usecases. You are going to make use of at least 2 of them.
- Cloud manager (desktop): The bridge between the farm and your machine.
- Web dashboard: The primary place to manage your jobs and account.
- Mobile application: An on-the-go, native alternative of the web dashboard.
There is overlapping functionality between the interfaces, so this is our recommendation:
- Use the Web dashboard to create and update your account
- Use the Cloud manager to submit jobs, as well as to manage plugins
- Use either the Web dashboard or Mobile app to manage active and archived jobs
Cloud manager
The Cloud manager is the bridge between the farm and your machine. It's necessary for submitting renders, but monitoring and further management can also be done on our web dashboard.
My Queue
Monitor all ongoing jobs in your queue. You can:
- Change job priorities
- Adjust the order in which jobs are evaluated
- Open the output and project folders through the right click menu
- Double click any job to open the slice view, where you can requeue and monitor the individual frames or slices This monitor works the same as the online dashboard. The difference is that the local version is slightly more accurate, while the online dashboard allows you to view detailed logs.
My Transfers
Track and manage all ongoing file transfers. This tab displays:
- Total upload and download sizes and speeds
- All uploads and downloads, including projects that are being uploaded and the downloads of final frames
My Archives
We store your final outputs for seven days. From this tab you can:
- Download the full project
- Download selected frames from another workstation After seven days all files are automatically removed from our servers.
Additional Tabs
You can open extra tabs from the View menu. These are not shown by default, but can be helpful in specific workflows.
Synced Projects
All uploaded projects are temporarily stored for seven days. If you upload assets that were already uploaded before, they will not be transferred again. This is handled per file. You can delete your project folders here if you want to clear storage manually.
Job Reports
Browse detailed reports for all completed jobs. These reports are useful when you want to review:
- Render times
- Costs
- Technical details of past jobs
- And much more This helps you estimate future workloads or compare different versions of a project.
Recent Jobs
Quickly resubmit previously uploaded jobs. For example, if you uploaded test frames and now want to render the full animation, you can:
- Select the previous job
- Adjust the frame range
- Change the number of slices
- Start the job again with updated settings
Activity Log and Event List
These tabs show a timeline of everything that happened inside your account. You can see:
- When jobs started or finished
- When jobs were canceled
- All other relevant actions in chronological order
Default tabs
My queue
Monitor ongoing jobs. You can change job priorities, modify the order your jobs are evaluated and open the output and project folders using the right-click menu. Double-click jobs to open the slice-view, where you can requeue and download specific slices.
My transfers
Monitor & manage ongoing transfers. Shows total upload size, progress and a graph of your speed over time, which lets you diagnose any network issue that may be slowing things down.
My archives
Manage recent job outputs. You can open the local folder output went to and delete the remote output. You cannot download (or redownload) outputs once they have been deleted from this menu.
Additional tabs
You can open additional tabs using the View menu. These can be useful in some situations, but aren't open by default.
Synced projects
Manage archived projects. Projects are a collection of all files uploaded for a single render application project file, like textures, simulations and other assets. Synced files are available for 7 days after they were last used by a submission.
Job reports
Look through detailed reports about completed jobs.
Recent jobs
Resubmit previous jobs with the same settings.
Activity log & Event list
Monitor Cloud manager logs. To see job-related logs, go to our web dashboard.
Web dashboard
Our website is the best way to monitor and manage your renders, credits, teams and more on the go.
Downloading our tools
The first thing you'll see opening the dashboard is a general overview page. We surface information on various parts of the service, such as credits, active renders, and most importantly options to download our tools.
Monitoring renders (jobs)
You can monitor active jobs on both the overview and the dedicated render monitor pages. Archived (finished) jobs are only visible on the dedicated page.
Monitoring slice logs
Each job is split into slices. When you open a job on the dashboard, you'll see all of its slices. Right clicking any slice with render progress lets you open its log.
Changing job priority
Each job's priority is displayed using a traffic light on the left. Clicking the appropriate circles lets you update the priority. Priorities are sorted top-down, with the top being the highest, and bottom the lowest.
Creating & managing folders
Enabling the "Edit" toggle in the active queue, you can modify the folders each jobs is in. Most jobs start out with no folder, but we automatically create folders for multiple jobs that resulted from the same submission - such as multiple takes of the same project.
You can create a folder by selecting any number of un-foldered jobs. Selecting jobs is only possible if all are in the same folder - either an existing folder, or none. You can easily move renders between folders by selecting them and choosing the appropriate control ("+" or "-") on the target folder.
Configuring your account
The studio settings page is where you manage all of your account settings. You can manage your details, billing information, security settings such as TFA (2-factor authentication), automatic top ups as well as teams.
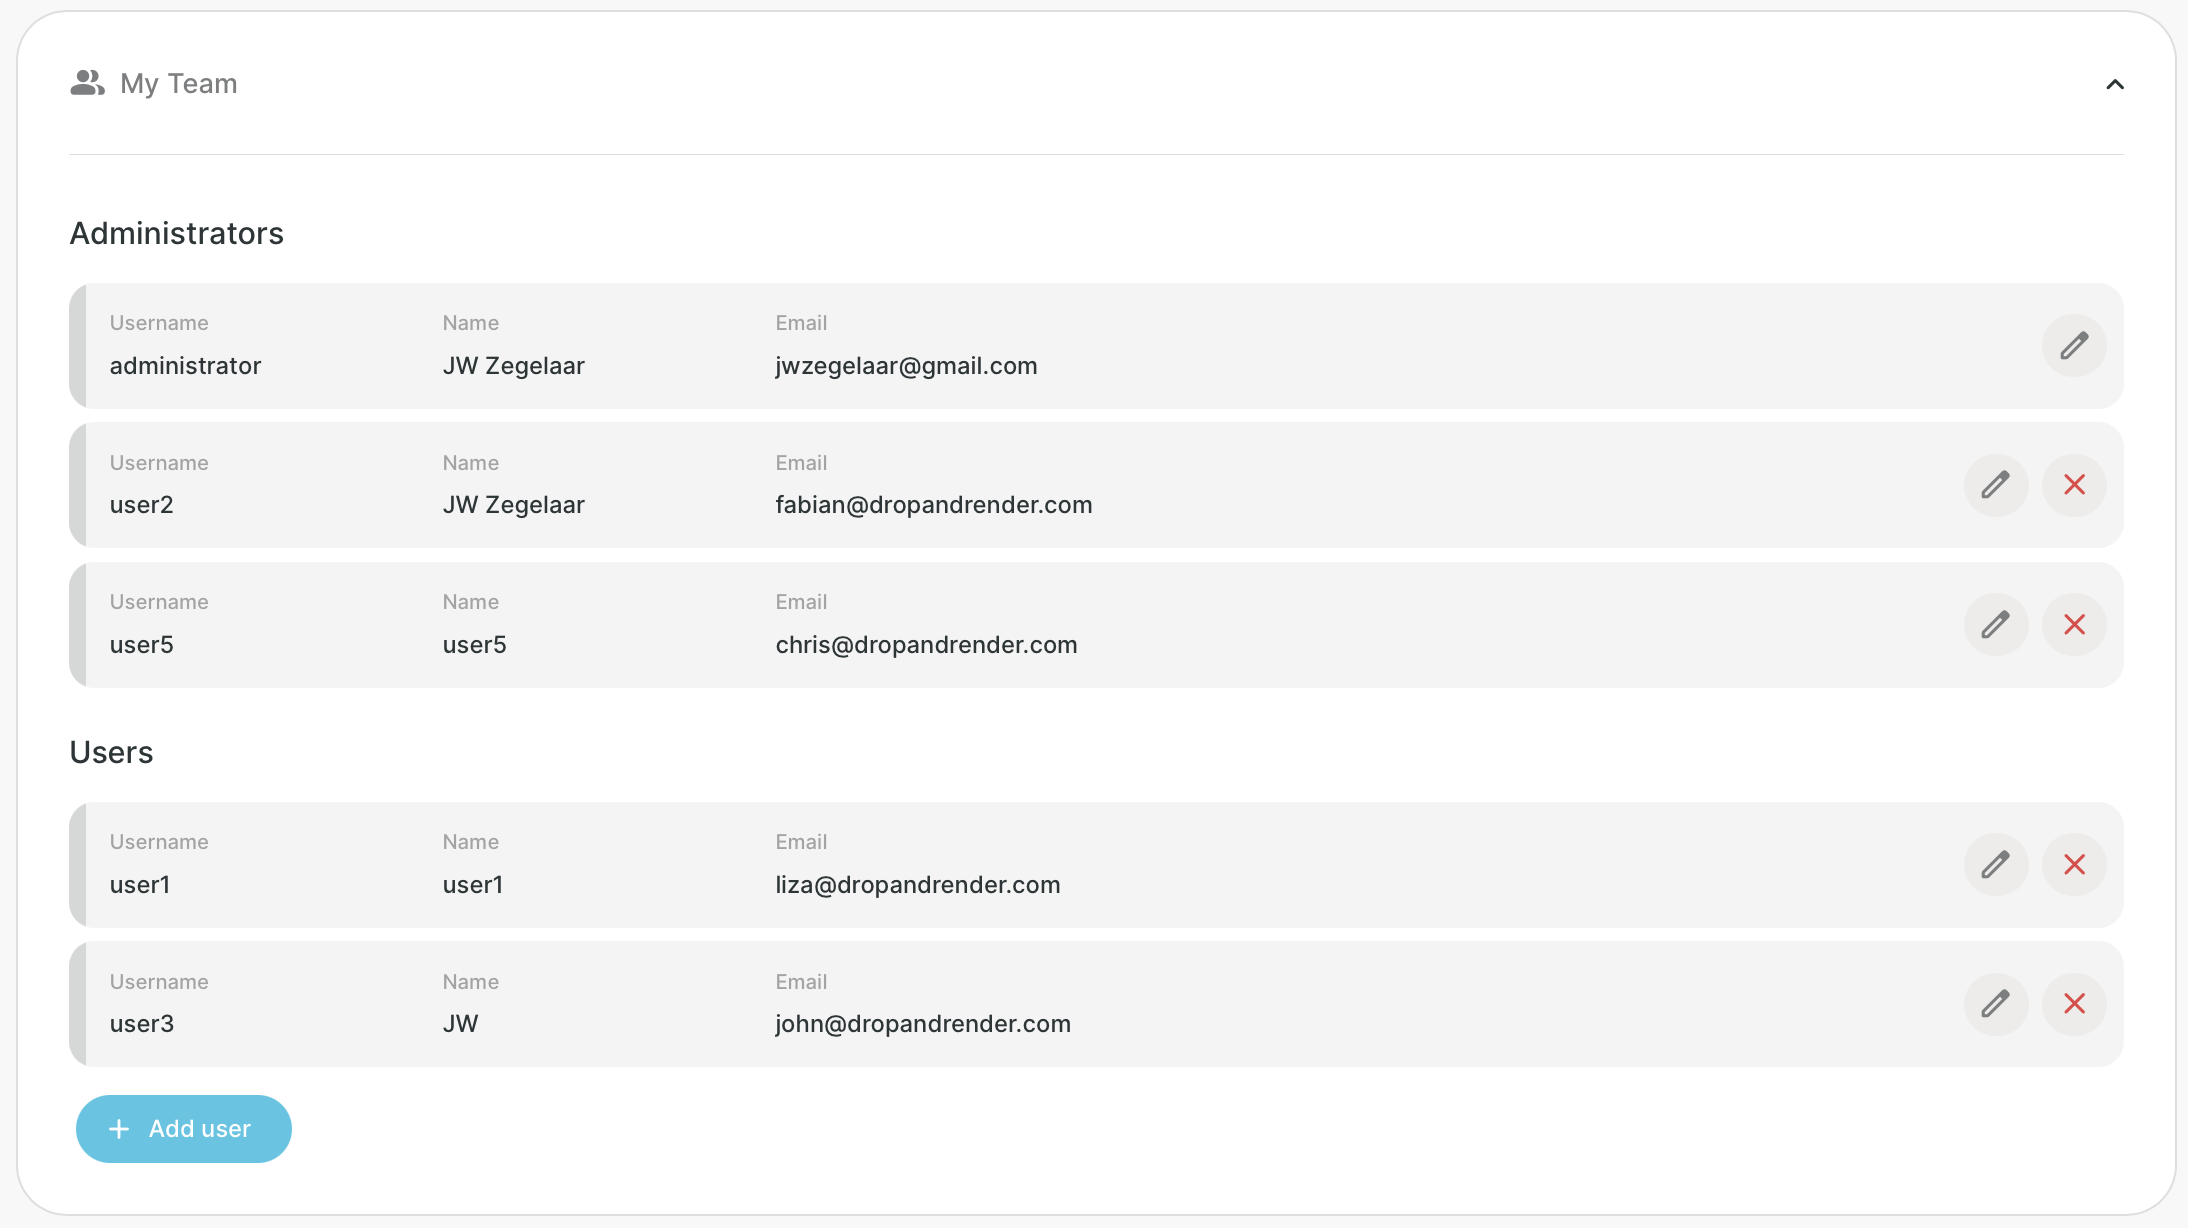
Managing teams
Teams let multiple users share credits and cloud storage under one account. The first account you create is the administrator. This account can invite members, who get their own job queues and account settings. Administrators can see and manage every job in the team. There are no per-seat upcharges.
| Feature | Admin | Member |
|---|---|---|
| Render jobs through our plugins | ✓ | ✓ |
| Manage personal account settings | ✓ | ✓ |
| Monitor personal renders | ✓ | ✓ |
| Access personal FTP folder | ✓ | ✓ |
| See personal invoices & usage metrics | ✓ | ✓ |
| Make payments, set up auto top ups | ✓ | ✗ |
| Manage team members | ✓ | ✗ |
| Manage studio render settings | ✓ | ✗ |
| Monitor studio renders | ✓ | ✗ |
| Access studio FTP folder | ✓ | ✗ |
| See studio invoices & usage metrics | ✓ | ✗ |
To set up a team:
- Create your account and install tools via the start rendering guide
- Invite members from the team management page
- Members can then submit jobs independently
Buying credits
Render jobs are funded through credits (1 credit = €1). The credit model lets us charge only for completed renders. Our servers still incur costs for failed jobs, but we absorb those expenses rather than passing them to you. This system ensures neither of us wastes resources on unsuccessful renders.
You can buy credits on any of the dashboard pages. We support the following payment methods:
- American Express
- Apple Pay
- Maestro
- Mastercard
- PayPal
- Visa
- Bancontact (BE)
- Carte Bleue (FR)
- Dankort (DK)
- EPS Ãœberweisung (AT)
- iDeal (NL)
- Trustly (Most of EU)
- SOFORT (EU)
Frozen credits
Occasionally our systems can detect that your account won't have enough credits to complete the entire job. In this case we put your account "on hold". Accounts that are "on hold" have their jobs paused - but not cancelled. All the progress until that point is stored.
You may see your account "on hold" when you have more credits than the job says it will need to complete. This is normal. Your "on hold" account might seem to have "more than enough" credits, since we only charge once the entire job has finished.
Topping up your account will unlock the hold, and all your jobs will resume.

